
A Comprehensive Guide to Blinds for Bay Windows
Bay Windows, despite all of their eye-catching beauty and royal vibe, will probably become relatively difficult to deal with, particularly when it comes to finding a suitable treatment for them. That’s primarily because of the somewhat odd (different from regular windows; let’s not be offensive!) profile of these windows, which technically are an outward projection of the wall.
When looking for a suitable or, let’s say, the right kind of window treatment for these adorable (and troublesome; beauty is pain!) windows, you’re meant to come across some sort of inconvenience. It could either be the choice of the treatment type (curtain, blind, shutter, etc.) or its orientation.
With that said, window blinds are considered a more useful option for bay windows as compared to any other option. The primary reason for this is that blinds are usually more flexible in their profile and come with various methods of fitting, which makes it easy to deal with them, essentially altering them according to the requirements.
Next up, comes the potential concern of which blind type to settle for, exactly, since there are literally tons of options available out there. Therefore, in order to address this genuine issue, we’re at your service to help you with the right and more of a favorable selection.
The Best Blinds To Consider For Bay Windows
Here are a couple of the best blind types that you can use next to your bay windows without indulging in any of the bothersome installations and most importantly, a lot of expenses.
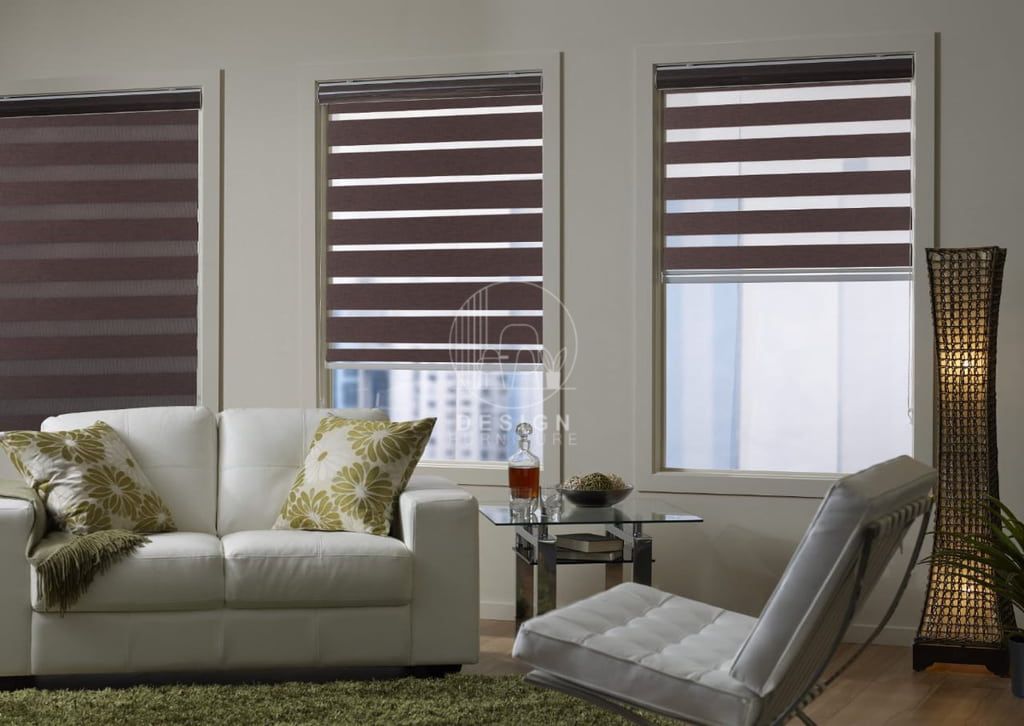
1. Cellular Shades
Otherwise known as Honeycomb blinds, cellular shades are one of the great window treatment options for bay windows because of their versatility factor. These shades or blinds come with the least depth requirement and therefore can be easily paired up with bay windows. They look presentable in both open-and-closed forms, and thus you don’t need to be concerned about the room styling either.
Besides being the best option for all the shallow spaces, these shades offer the added perk of disappearing nearly the moment you raise them completely. This way, they don’t consume any excessive window space and provide better control over the incoming light as well. The same goes for your privacy protection too, and you’ll find these blinds to be really promising.
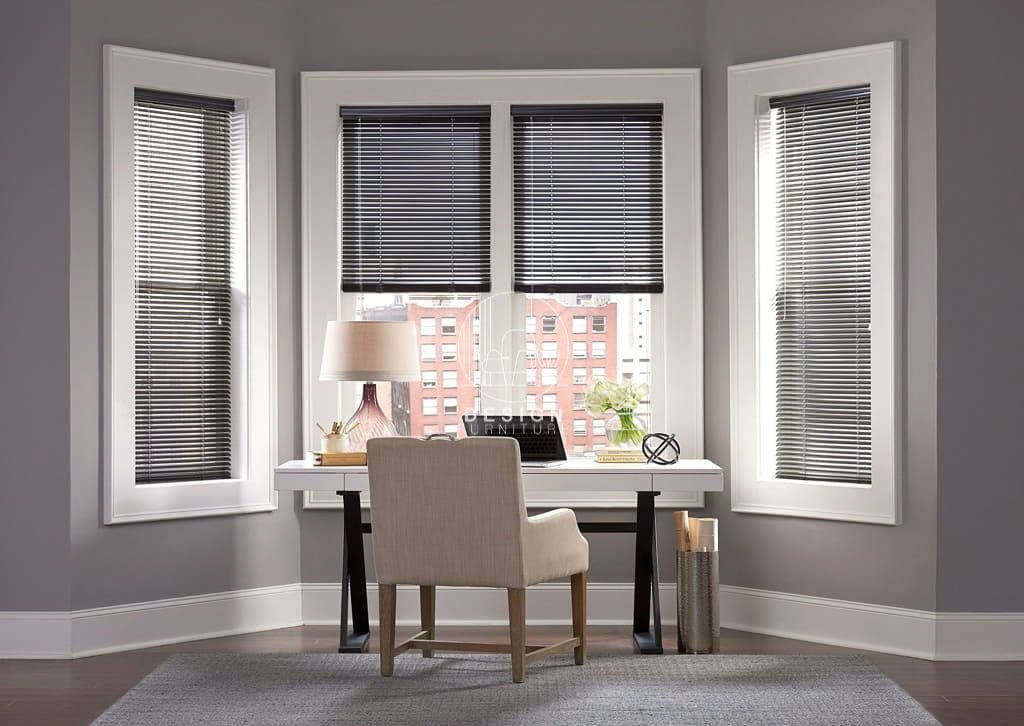
2. Venetian Blinds
The good old vintage beauty of Venetian Blinds has always been a favorite choice for any and every window profile, and bay windows aren’t an exception either. These blinds are a specifically great option for larger windows, so they are meant to look good next to your bay windows, as well. Over and above, you can have them in multiple different materials, such as the aluminum Venetian Blinds or even those made of plastic.
Venetian Blinds not only look the most presentable but also provide incredible light and privacy control, so you can easily adjust the environment of your room according to your preferences. Also, the slats of Venetian Blinds aren’t excessively wide, so they won’t take up any window space, thus letting you enjoy the outside view without any restriction. The durability you get is seriously impressive, and you can expect these blinds to serve you for a long time.
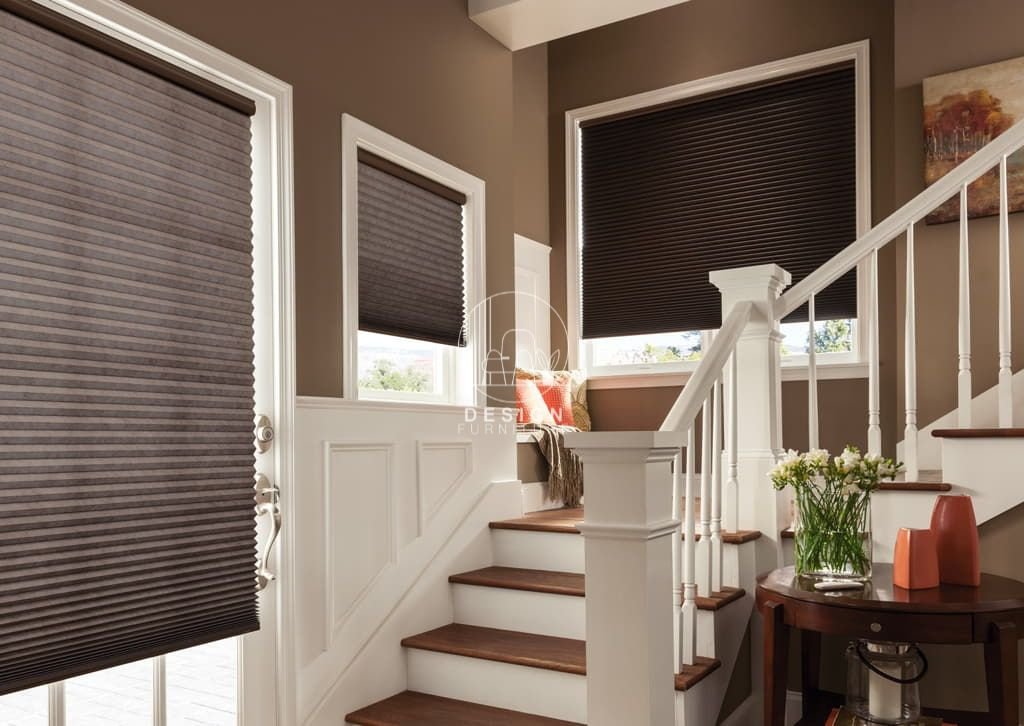
3. Roman Blinds
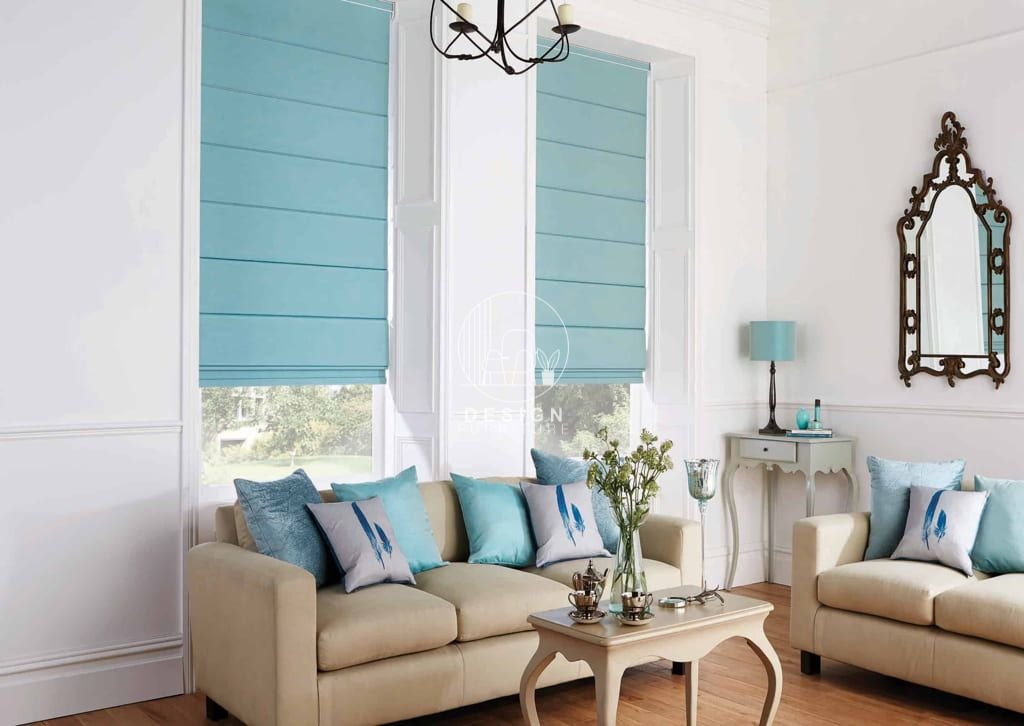
Roman blinds are another great option to consider if you want your bay window treatment to be appealing and functional at the same time. Their profiles don’t require a lot of depth, unlike the roller blinds, and there are no unpleasant-looking large gaps at the sides either, which could let a lot of light enter the room. Also, these blinds are the easiest to deal with, particularly when it comes to a seamless installation.
Roman window blinds come in endless options of designs, patterns, and colors, so you’ll find it really pleasurable to pick out the perfect décor match for your place. Moreover, these blinds allow extensive customization as well. For instance, you can add multiple linings along with these blinds, such as the blackout lining, the light filtering one, or simply a thermal lining for added insulation.
4. Roller Blinds
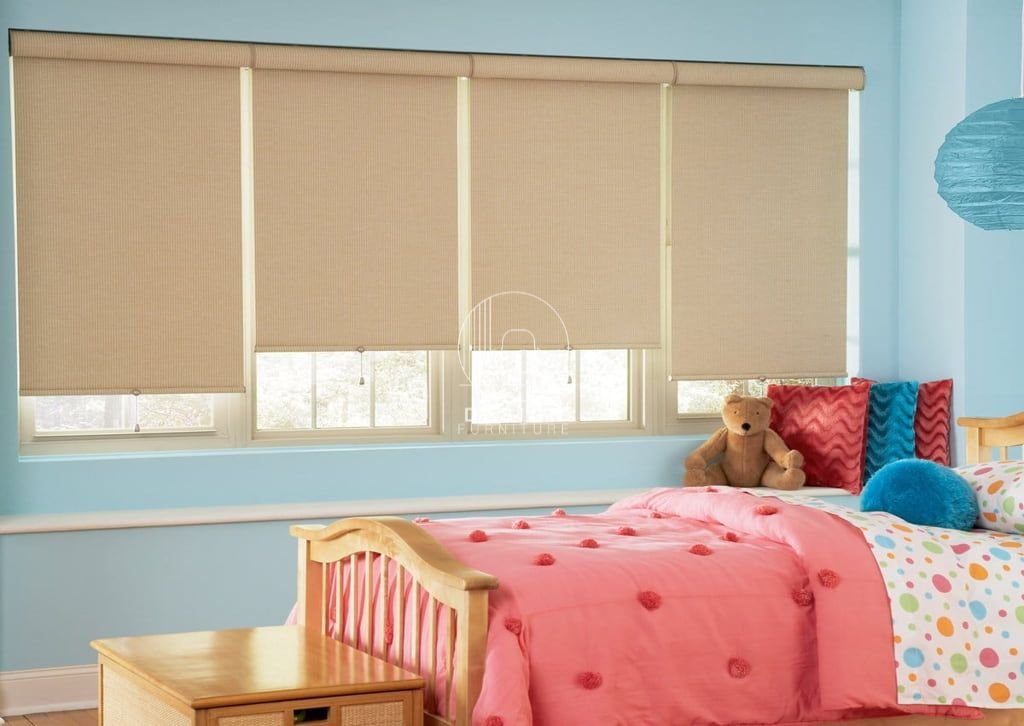
Roller blinds are one of the most incredible recommendations for bay windows thanks to their higher coverage levels (no gaps) and various modes of movement. You can have these blinds fitted exactly to your window profile and also the manner in which they get rolled. The most common example in this regard is those bay windows that have protruding handles.
There are multiple design and color options available for roller blinds, and you can also choose the type of fabric for your blinds. It could either be the blackout fabric or the dim-out one, in accordance with your desired extent of illumination within the room. The most fundamental plus point of roller blinds lies in the fact that they are the cheapest of all and the most cost-effective too.
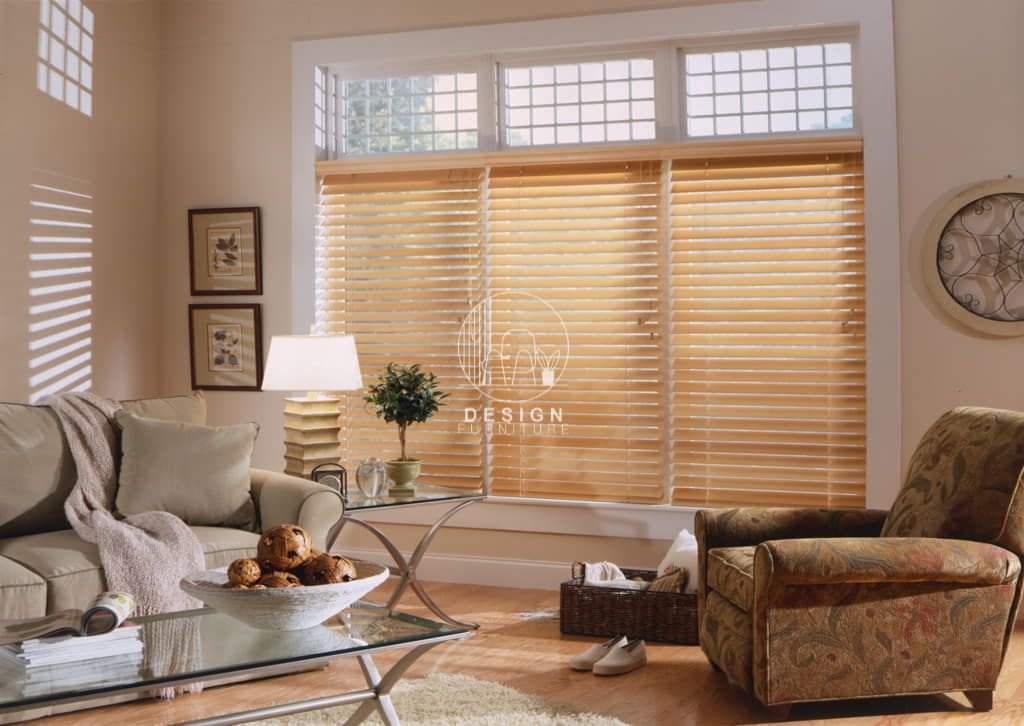
5. Wood Or Faux Wood Blinds
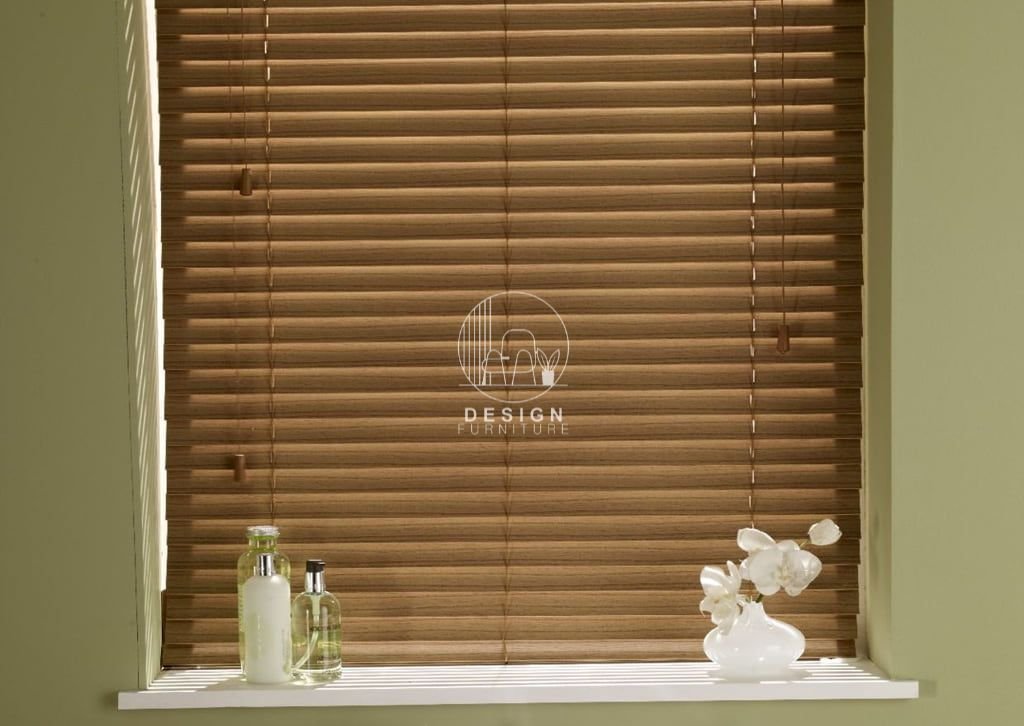
Wood blinds are, of course, a really adorable choice to dress and enhance your bay windows with. They have smaller slats and provide a perfect fit for the window with no gaps. You might as well, get the wooden blinds with wide slats in case your bay windows have narrow mullions or there are multiple acute angles present between the sections of the windows.
Faux wood blinds, on the flip side, feature a PVC construction. However, they appear exactly like wooden blinds, so you can enjoy the aesthetics of the former without the need for a lot of maintenance. Besides, since these blinds are made of PVC, they are an ideal option for spaces with humidity or moisture problems.
6. Mini Blinds
Mini Blinds are also a versatile and quite useful option to acquire for bay windows. These blinds are easy to operate, i.e. they close and tilt open, in order to provide greater control over the amount of incoming light. They don’t require a lot of depth yet will perfectly fit the headrail present in your window opening.
As for the construction of these blinds, their slats are made of aluminum alloy, which has an efficient resistance against denting and scratching, therefore ensuring great durability. You can benefit from the versatile color options available for Mini blinds and they also offer the major advantage of budget-friendliness. Also, they are a great recommendation for external usage.
In The End
Bay windows can sometimes be really demanding to tackle, and since covering them the right way is a dire requirement, things are meant to get tricky. We hope our comprehensive Guide to Blinds for Bay Windows will be very helpful to you in order to settle for the perfect choice.
The blind types we’ve mentioned are practically useful and will benefit you with their impressive performances. They are great at beautifying the bay window and the surrounding space as well, so you won’t need to be concerned about the decor maintenance in any way either.
Do try these blind types and you’re meant to find them working wonders for you!
Frequently Asked Questions (FAQs)
Both Faux Wood Blinds and real wood blinds work wonders for bay windows, thanks to their small slats which provide just the perfect coverage. Such blinds completely fit the bay windows without leaving any gap, and they also make it really easy to adjust the incoming light.
There are multiple elements you can consider for your bay windows, other than blinds, and these include Cafe style shutters, hanging one and more than one curtain panels, paneled patents and solid shutters. Also, you can have various further styling creations with these smart ideas.
Though Blackout blinds don’t essentially suit bay shaped windows in the first place, you can still achieve the same functionality with various smart alternatives. And the most common one of them is adding a blackout lining to any existing window treatment, most probably Roman Blinds for acquiring the desired room darkening for your surroundings.


